[Guide] Generate UI with AI, directly in Figma
![[Guide] Generate UI with AI, directly in Figma](https://www.datocms-assets.com/16499/1714315104-uxpilot-generate-ui-figma.jpg)

Chinwe Uzegbu
Created on May 5, 2024
AI has transformed design processes, enabling designers to accelerate their workflows and produce results quickly. AI tools now assist with everything from generating ideas and sketching wireframes to creating refined UI designs.
UX Pilot is a notable AI tool that enhances design workflows and revolutionizes design communication, particularly for Figma users.
With UX pilot, you can turn a simple text prompt like:
“A matchmaking platform that connects individuals based on their shared passions and interests”
into this hi-fi design in a matter of seconds:

-
Create an account
-
Upgrade to the paid plan
-
Launch the plugin in Figma
-
Prompt the AI
-
Edit your designs
So, if you’re ready to explore the power of UX Pilot, let’s get started.
About UX Pilot
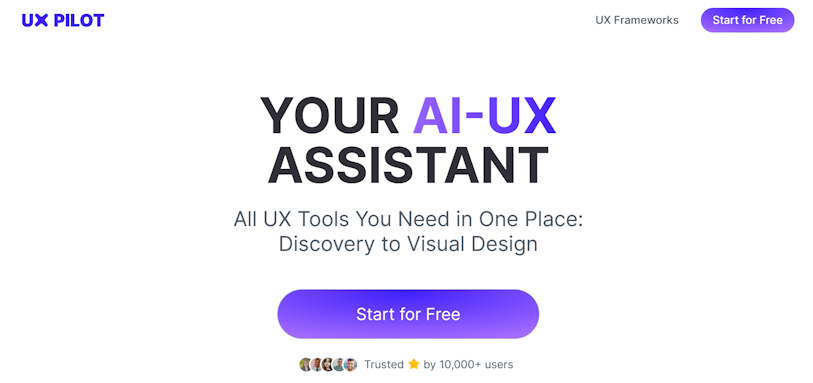
UX Pilot is an AI-powered web app and Figma plugin that enhances every stage of your UX design process, from discovery to final design. This tool allows you to create interview questions, analyze interview transcripts, develop wireframes and high-fidelity designs, conduct design reviews, design custom workshops, and more.
Let's see how this tool can be used to generate UI designs in Figma.
How to generate UI designs and screens in Figma with UX Pilot
1. Create an account
To access UX Pilot's features, you need to sign up, which is a quick and easy process. Go to uxpilot.ai and click the 'Start for Free' button. You can register using either Google authentication or your email address. If you choose email, simply fill in your details, verify your email, and your account will be ready.
Once your account is set up, you can begin exploring UX Pilot for free. For full access to all features, including the hi-fi UI generator, consider upgrading to the paid plan at $6 per month.
2. Upgrade to the paid plan
On the homepage, click the 'Upgrade' button at the top of the screen. Then, select the unlimited plan and click 'Upgrade' again. Follow the prompts to complete your payment.

Once done, you’re ready to access UX Pilot’s premium features, including the hi-fi UI generator.
3. Launch the plugin in Figma
From your Figma design file, go to the plugins community and search for UX Pilot. Then select UX Pilot AI: UI Design & Wireframes from the available plugins.
Or alternatively use this link.
Once the UX Pilot plugin window appears, it’s time to prompt the AI.
4. Prompt the AI

In the 'Write prompt' field, enter a short description of your project. For instance, let's have the AI create a landing page for a job search platform.

Prompt: Landing page for a job search platform.
One great feature of UX Pilot is its customization options. You can select your preferred colors and fonts, ensuring the design aligns with your style.
Now, back to our task. After entering your description, click 'Generate hifi design', relax, and let the AI quickly handle the rest. It only takes a few seconds.

Just like that, you have a high-fidelity mockup of your design. Every element is editable, allowing you to tailor it as needed.
Simple, isn’t it?
Now, let’s step it up. We’ll ask the AI to create high-fidelity designs for a matchmaking platform, but with a more detailed prompt.
Here’s what we'll do:

prompt: A matchmaking platform that connects individuals based on their shared passions and interests.
The AI successfully generated the homepage for the matchmaking platform, perfectly aligning with the provided text prompt.
The homepage boasts several impressive features:
-
A calendar to track your social events
-
An overview of your latest matches
-
Reviews to let you know what others are saying about the platform
-
Interest groups like food lovers and adventure enthusiasts to help you connect with your people.
These features can spark some creative ideas. Next, let's explore how UX Pilot aids in creating mobile designs. We'll refine our prompt and focus on a mobile app. Here’s our new prompt:
A matchmaking platform that connects individuals based on their shared passions and interests.
UI components:
-
A welcome message
-
A search field for users to find matches based on interest
-
Display cards showing recent matches
-
Display cards showing interest groups

Here’s the result:

We've included a search field, a welcome message, and cards for recent matches and interest groups, all in line with our specified color scheme and font. Impressive, right?
5. Edit your designs
UX Pilot now supports editing your AI-generated designs directly through text prompts.
Edit Section
The Edit Section feature allows you to modify specific parts of a screen without affecting the rest of the design—and it’s pretty fast.
Here’s how it works:
- Double-click on a screen.
- Hover over specific areas (these are intelligently detected by AI).
- Click "Edit" to select the area you want to modify.
For example, let’s say the calendar at the bottom of your screen only has one row.
We can quickly tweak that section without changing the entire design.

Here’s the outcome:

Simple, right?
Edit the Whole Screen
Unlike Edit Section, the Edit Whole Screen feature re-generates the entire design. This is perfect when you need to:
- Apply major design changes.
- Create new screens based on an existing layout.
- Fix broken layouts effortlessly.
Here’s a clever way to use this feature: let’s assume you’ve got a design you’re happy with, but now you want to generate a “Products” page based on its layout without starting from scratch.
With just a few clicks, you can refine your design and let UX Pilot handle the rest.
Click on the Edit button in the top right corner of the page.

Then prompt the AI to generate a product page.
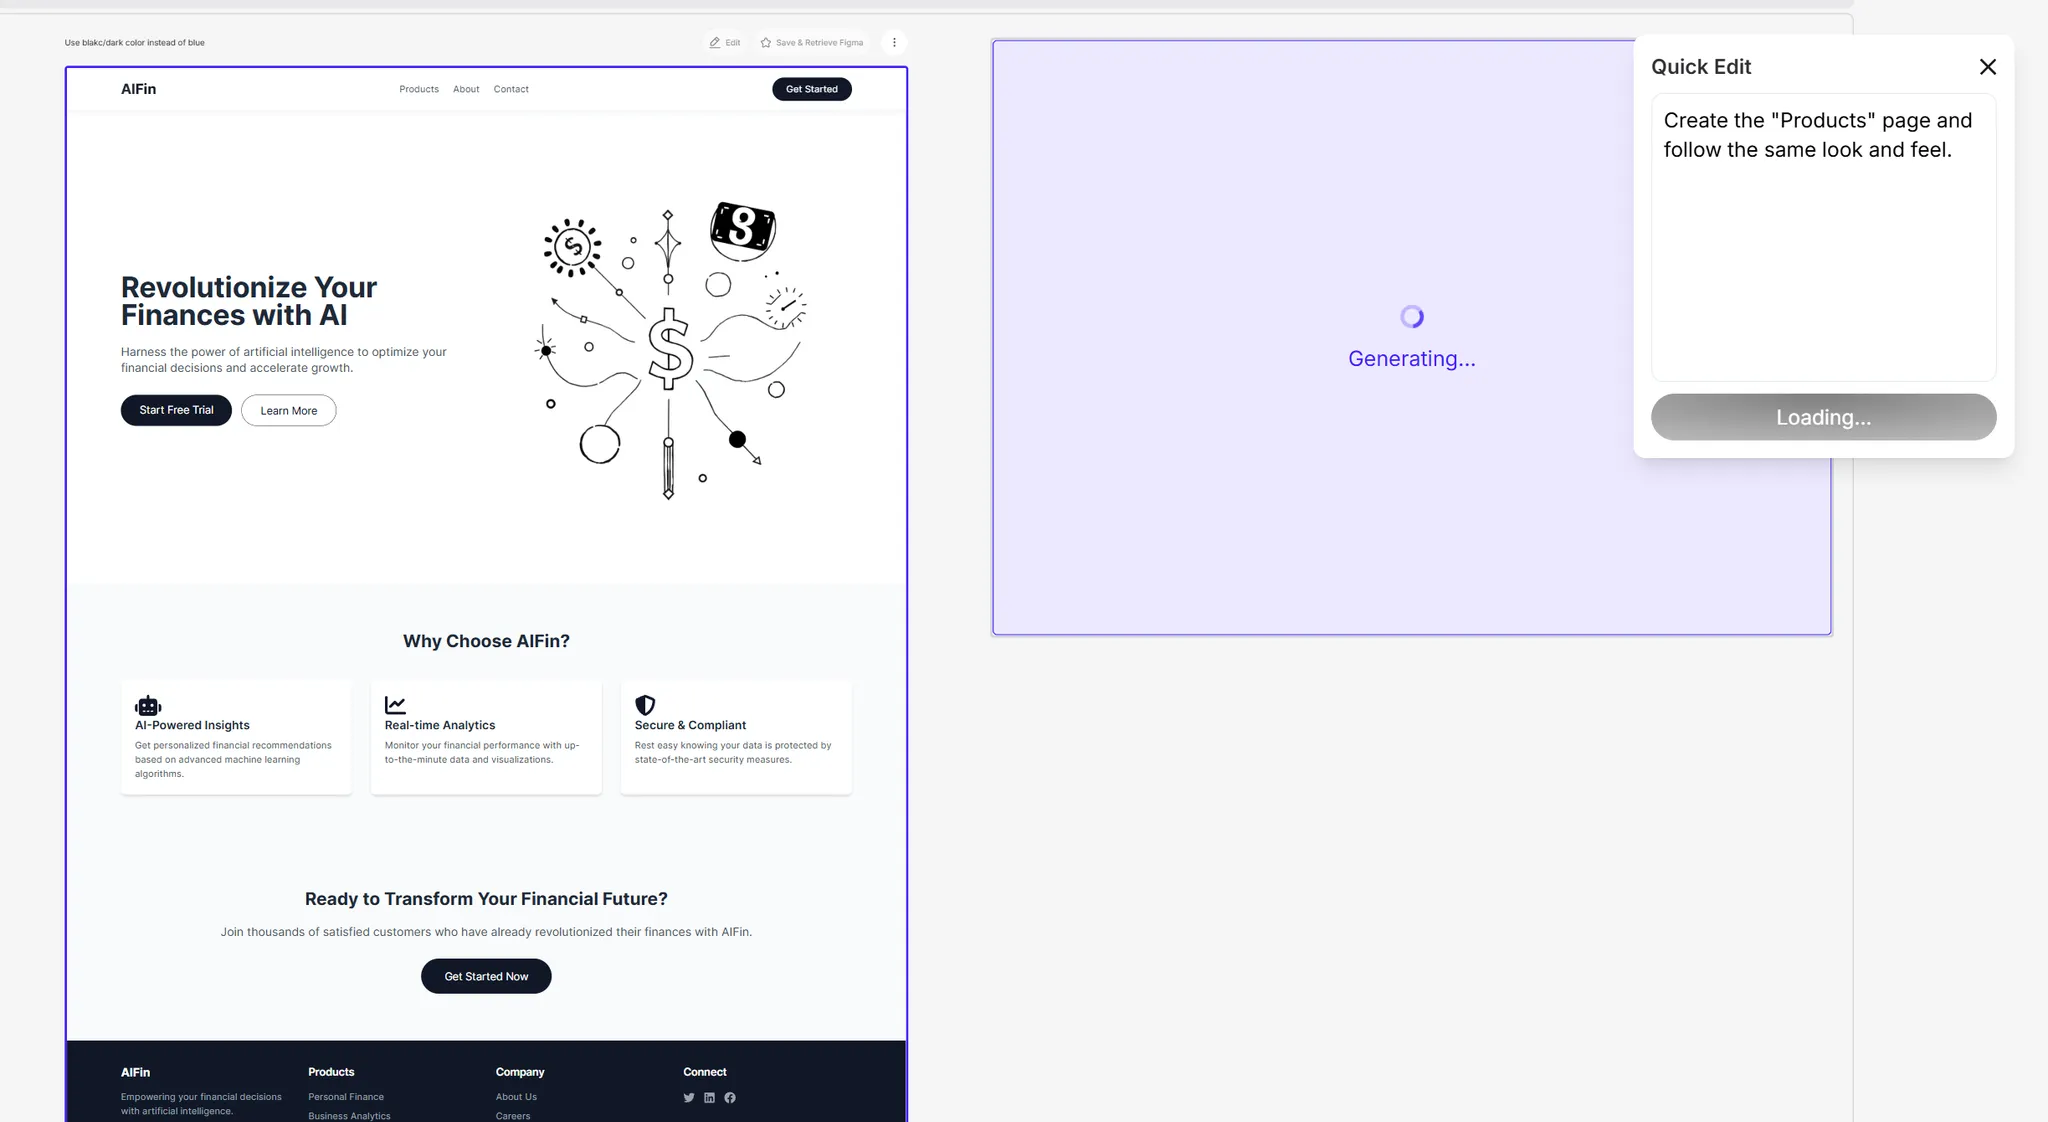
Here’s what we got:
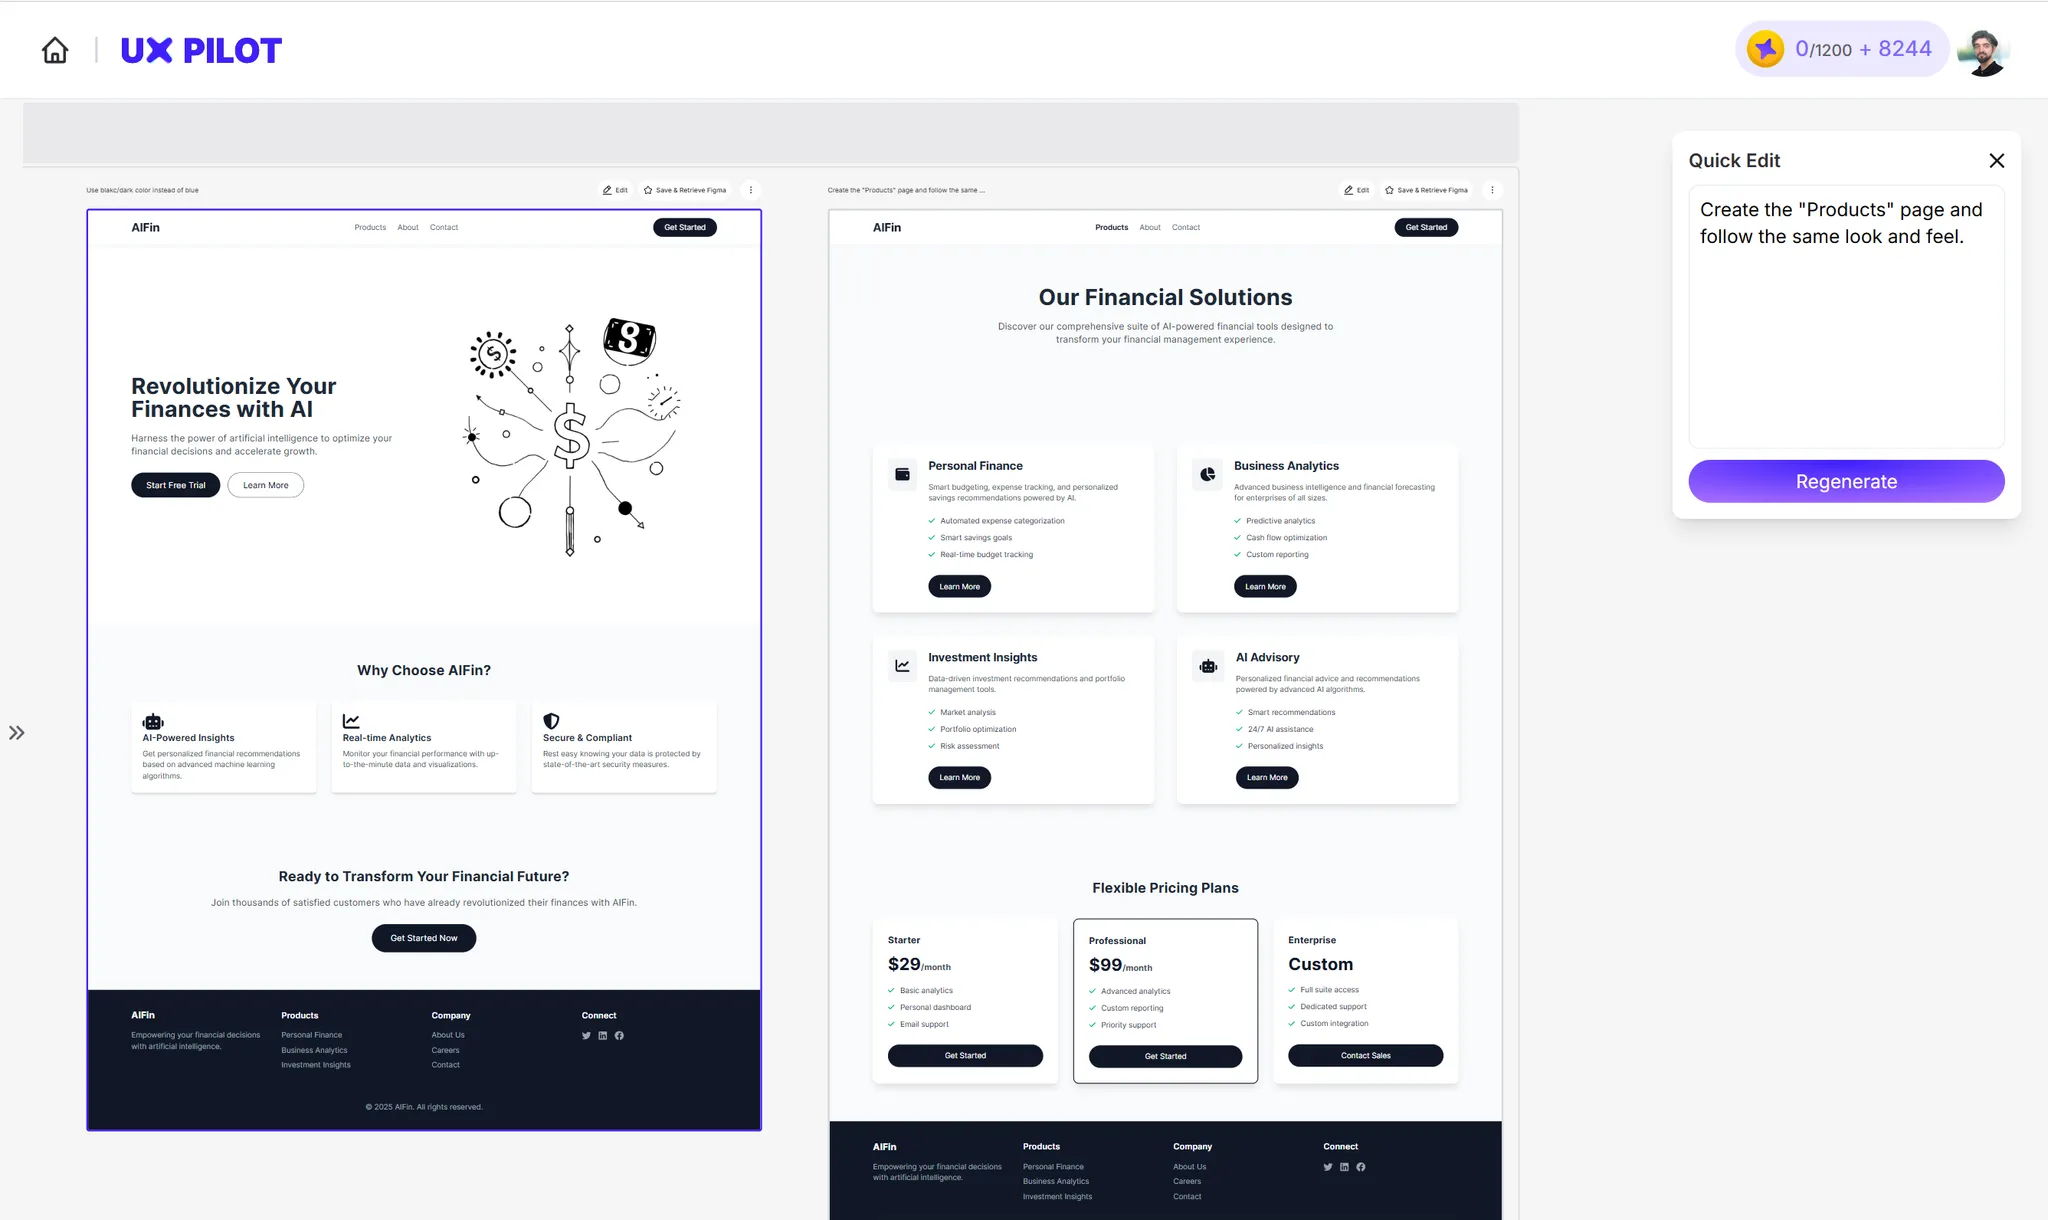
You can even go further to spin off more pages based on the newly created pages; it’s that flexible.
6. Generate Components with AI
You don’t have to generate full screens every time! With UX Pilot, you can also create individual components—or even multiple components at once.
Simply describe what you need, and the AI will generate components tailored to your design. Whether it’s buttons, input fields, cards, or entire sections, you can quickly bring your UI to life without starting from scratch.
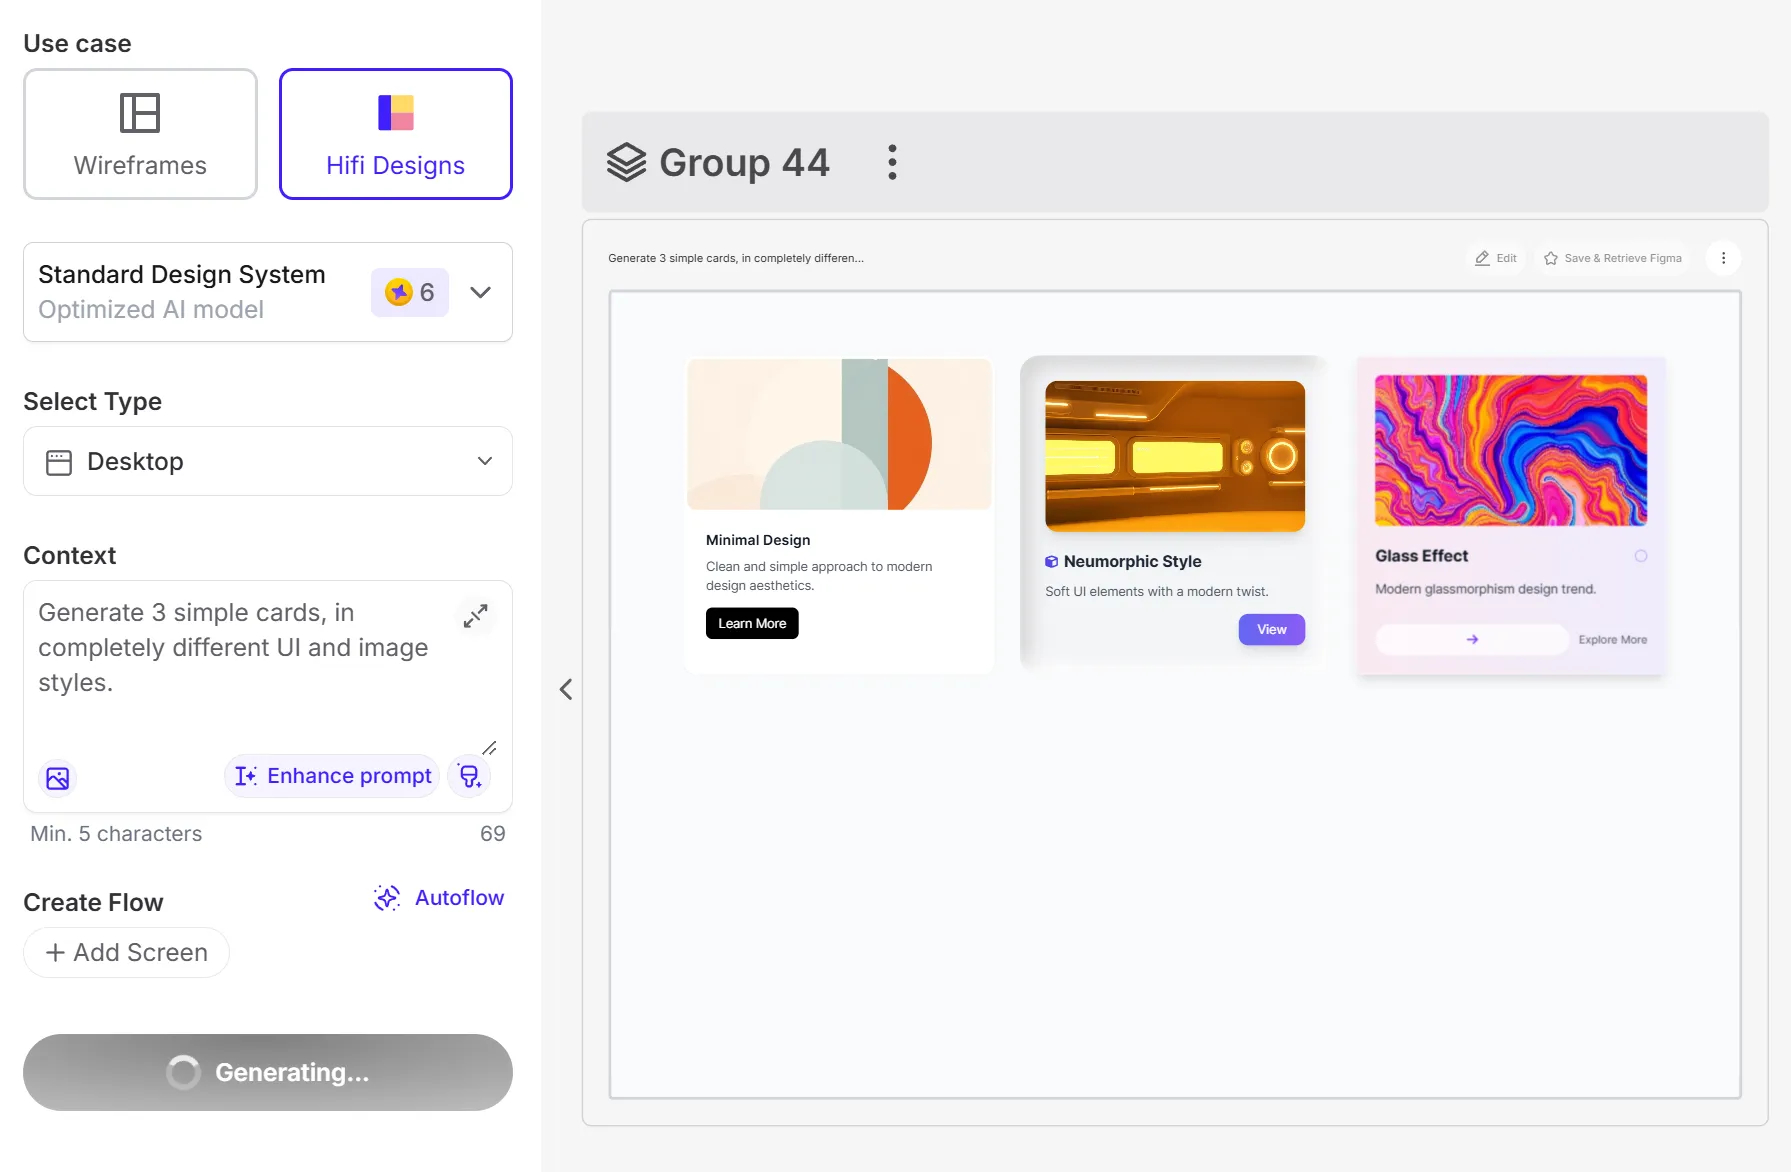
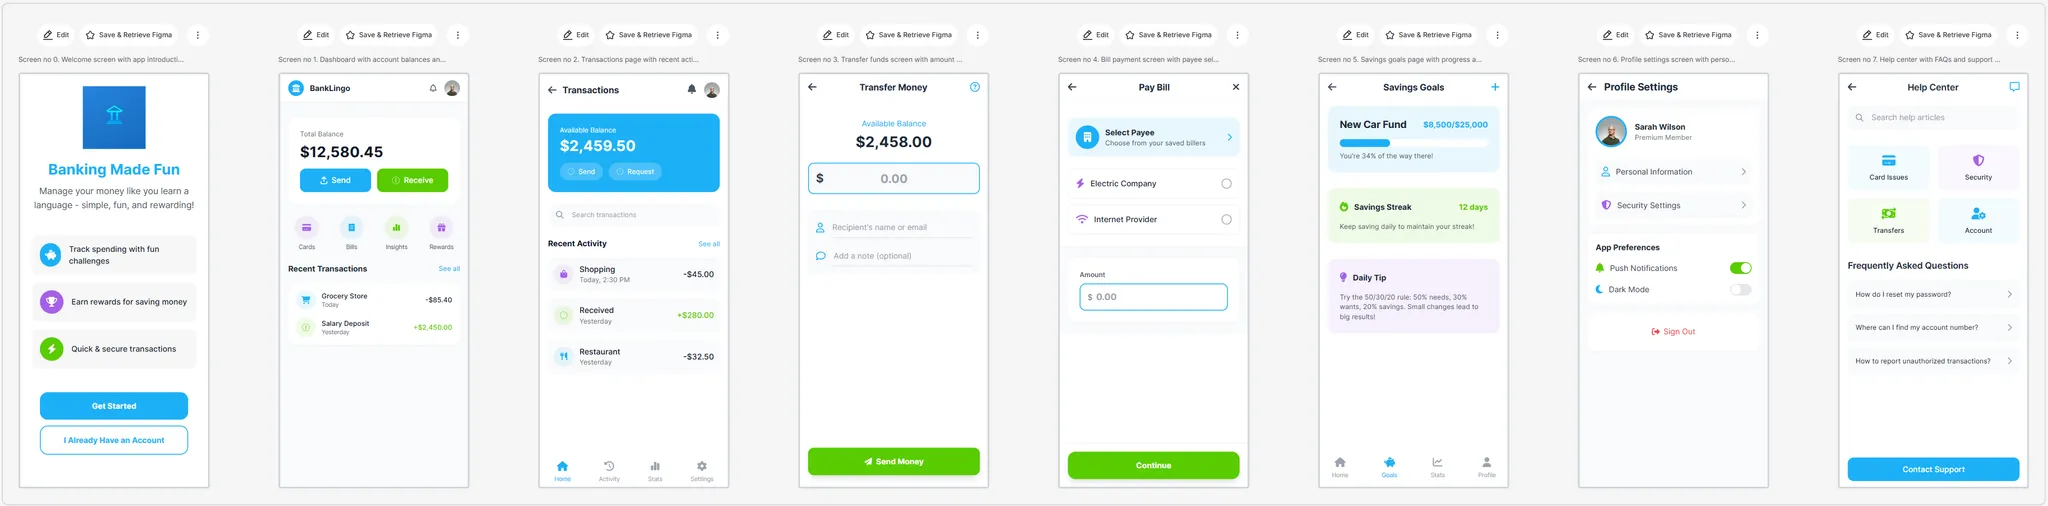
7. Create a Flow
Need to create more than one screen at once? Don’t worry. UX Pilot is also up to the task.
With just a prompt, UX Pilot can generate a sequence of screens for your design. You can do this in two ways:
- Define them manually – Specify each screen and how they connect.
- Use Autoflow – Let AI automatically determine the best screen transitions.
Let’s put it to the test with a mobile app.
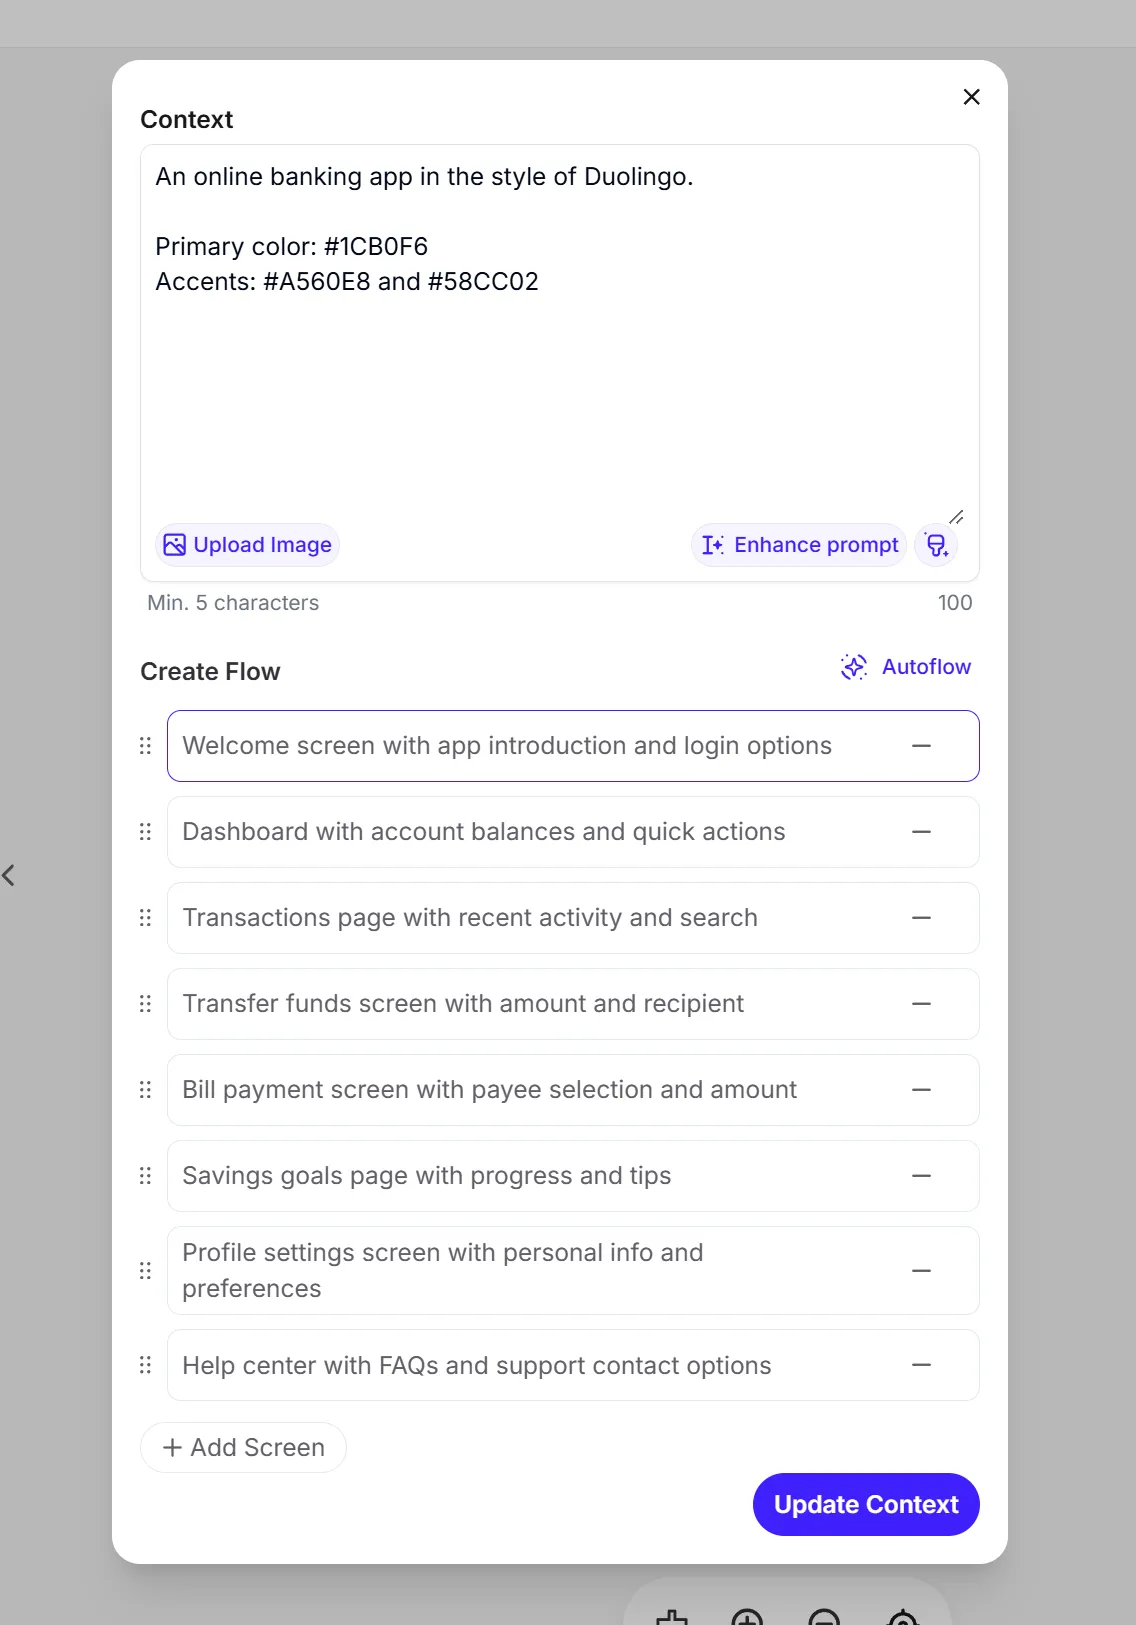
Pro tip: When generating flows, the context applies to all screens. The more details you provide—like colors, navigation elements, and common UI components—the more consistent and polished your results will be.
Our result:
8. Use Custom Assets or Logos in Your AI Designs
Currently, UX Pilot doesn’t support direct uploads for custom assets or logos, but there’s an easy workaround.
Here’s how to do it:
Upload your asset (e.g., a logo) to PostImages.
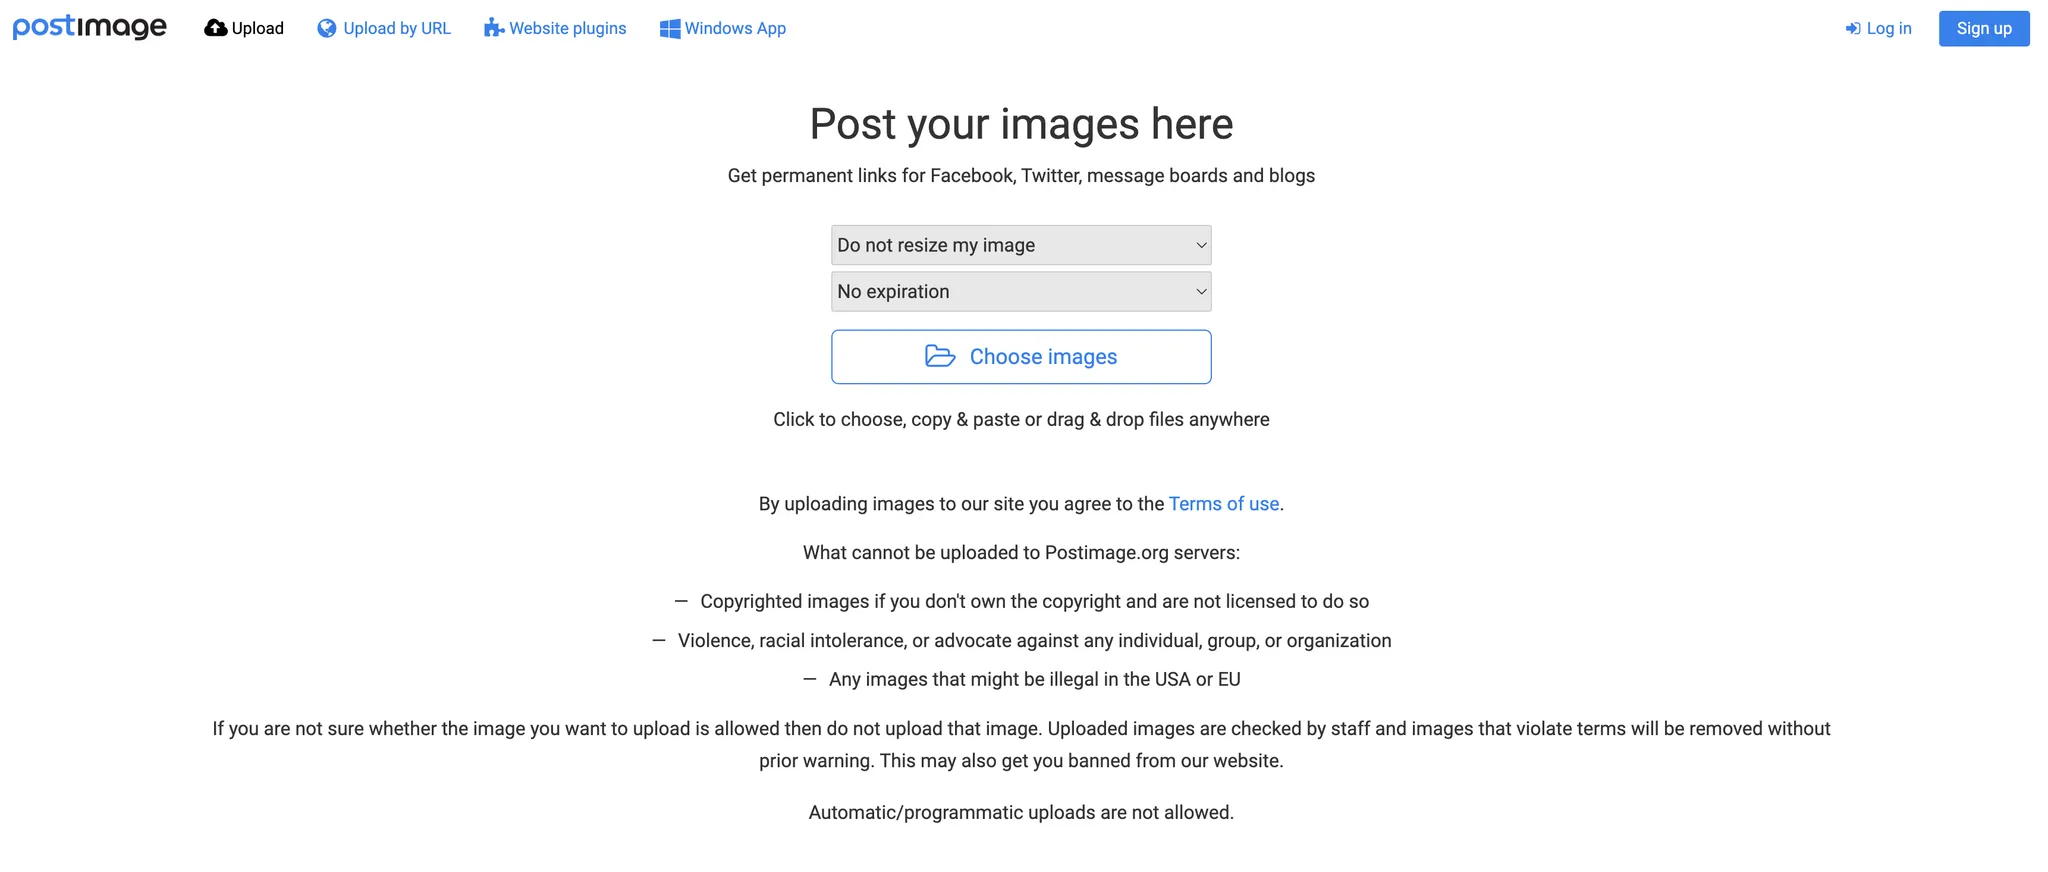
Copy the Direct Link (e.g., https://i.postimg.cc/Wb3336bT/afs-logo.png).

In UX Pilot, paste the link into the context field and describe what it is.
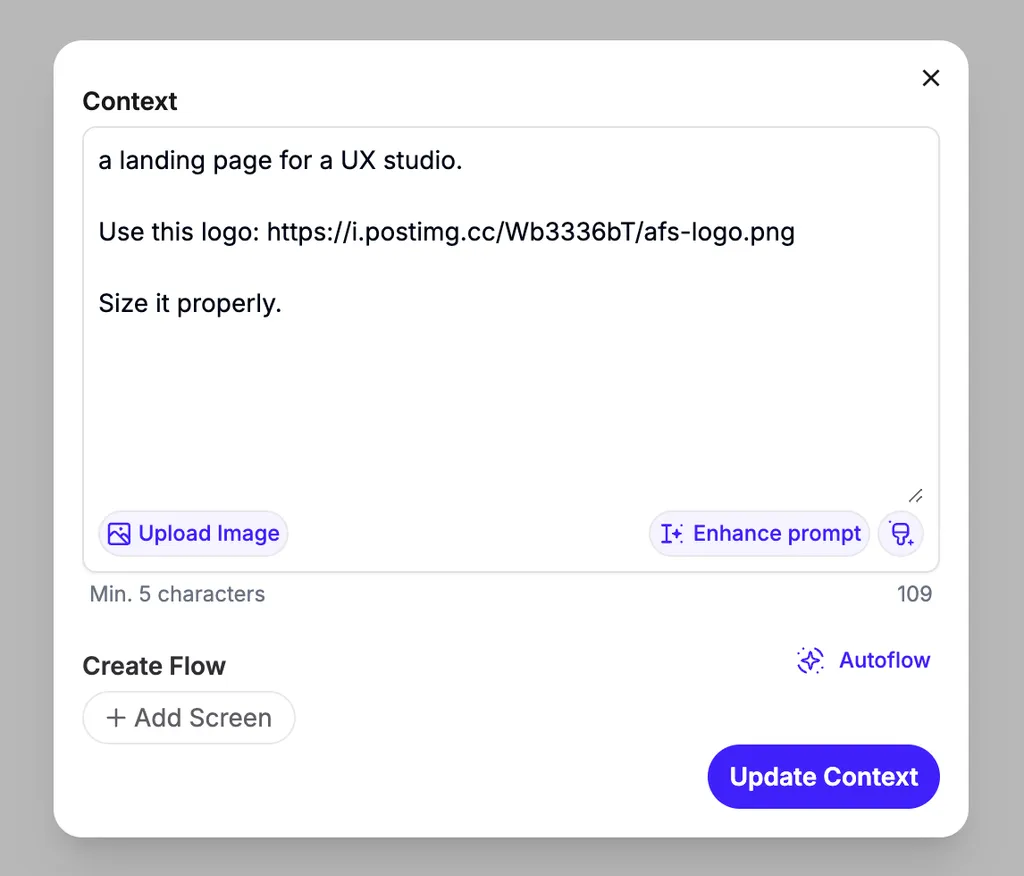
If you’re using multiple assets with different sizes, just mention their relative sizes—no need to be super precise!
On clicking Generate, this is the result we got:

As you can see, the AI fits our logo perfectly into the footer section of the page.
Final Thoughts
Although UX Pilot is a relatively new tool, it has already shown its value to designers. As the design industry continues to evolve, AI-powered tools like UX Pilot can keep designers at the forefront of innovation and efficiency, reshaping our approach to design.
The article explores how AI is used to generate UI designs, showcasing one of the many capabilities of UX Pilot. The results are impressive.
Why not give UX Pilot a try?